You will need access to the DNS records for your Domain in order to configure it for Jetify Cloud.
Adding a Custom Domain
- In your project on the Jetify Cloud Dashboard, select Settings
- Scroll down to the Custom Domain section on the settings page
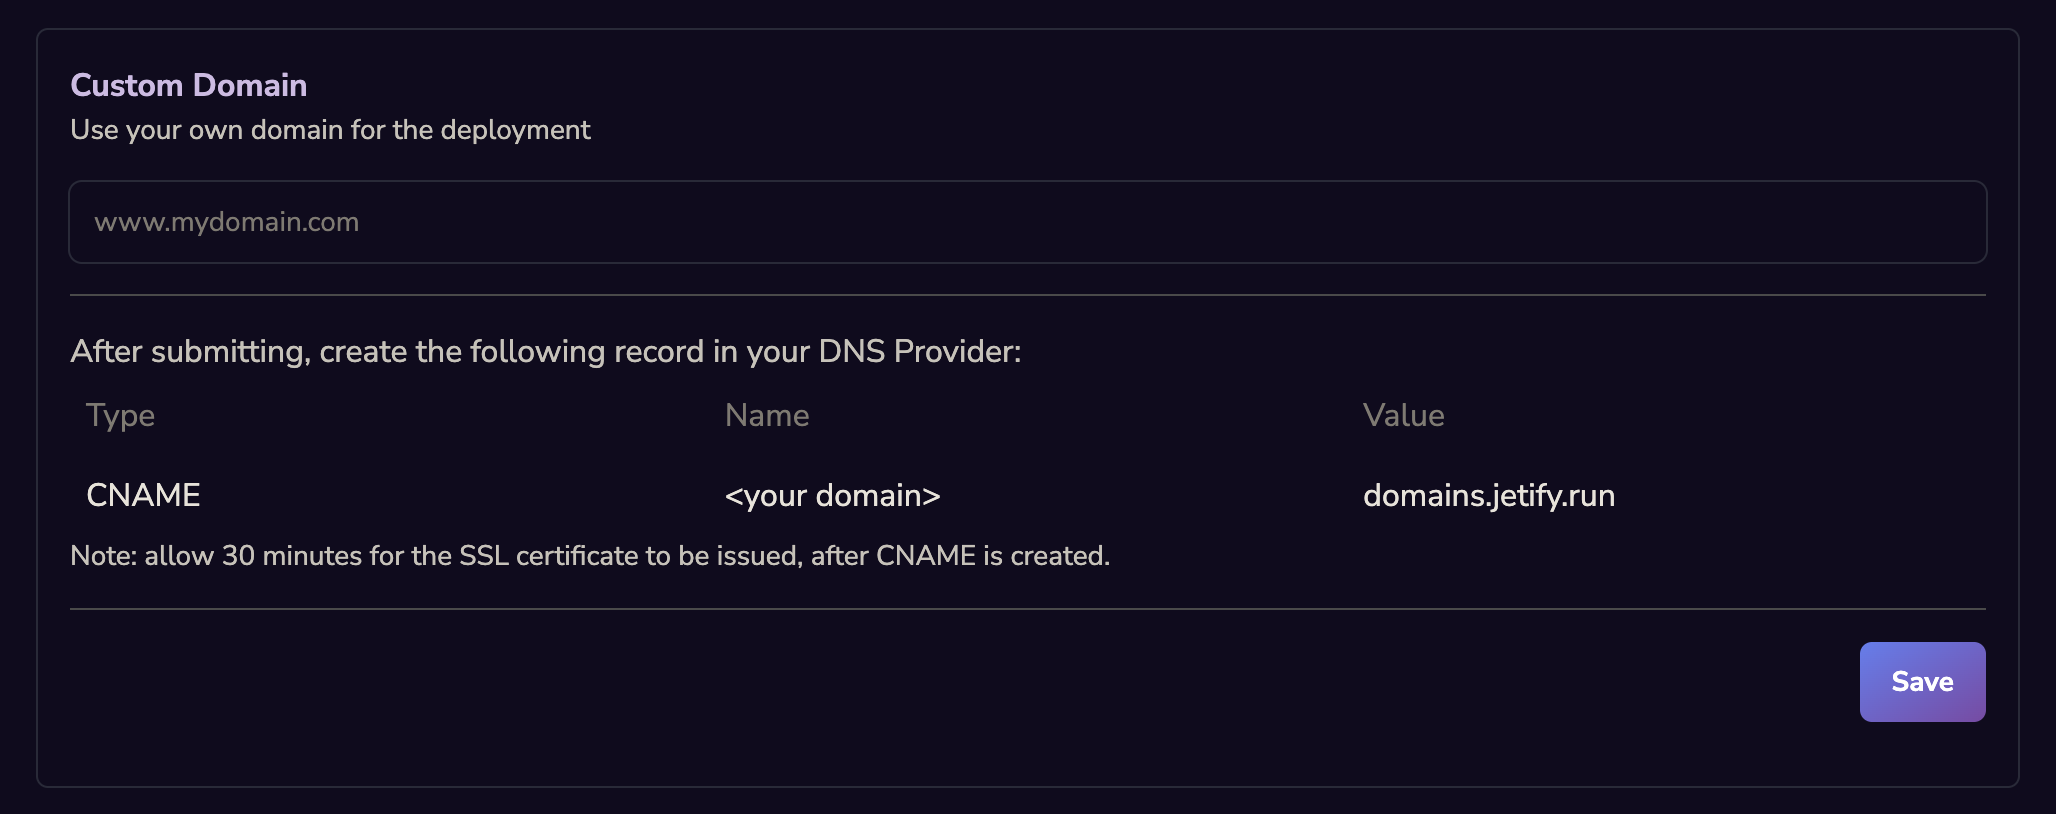
- Enter the custom domain name that you would like to use for your project
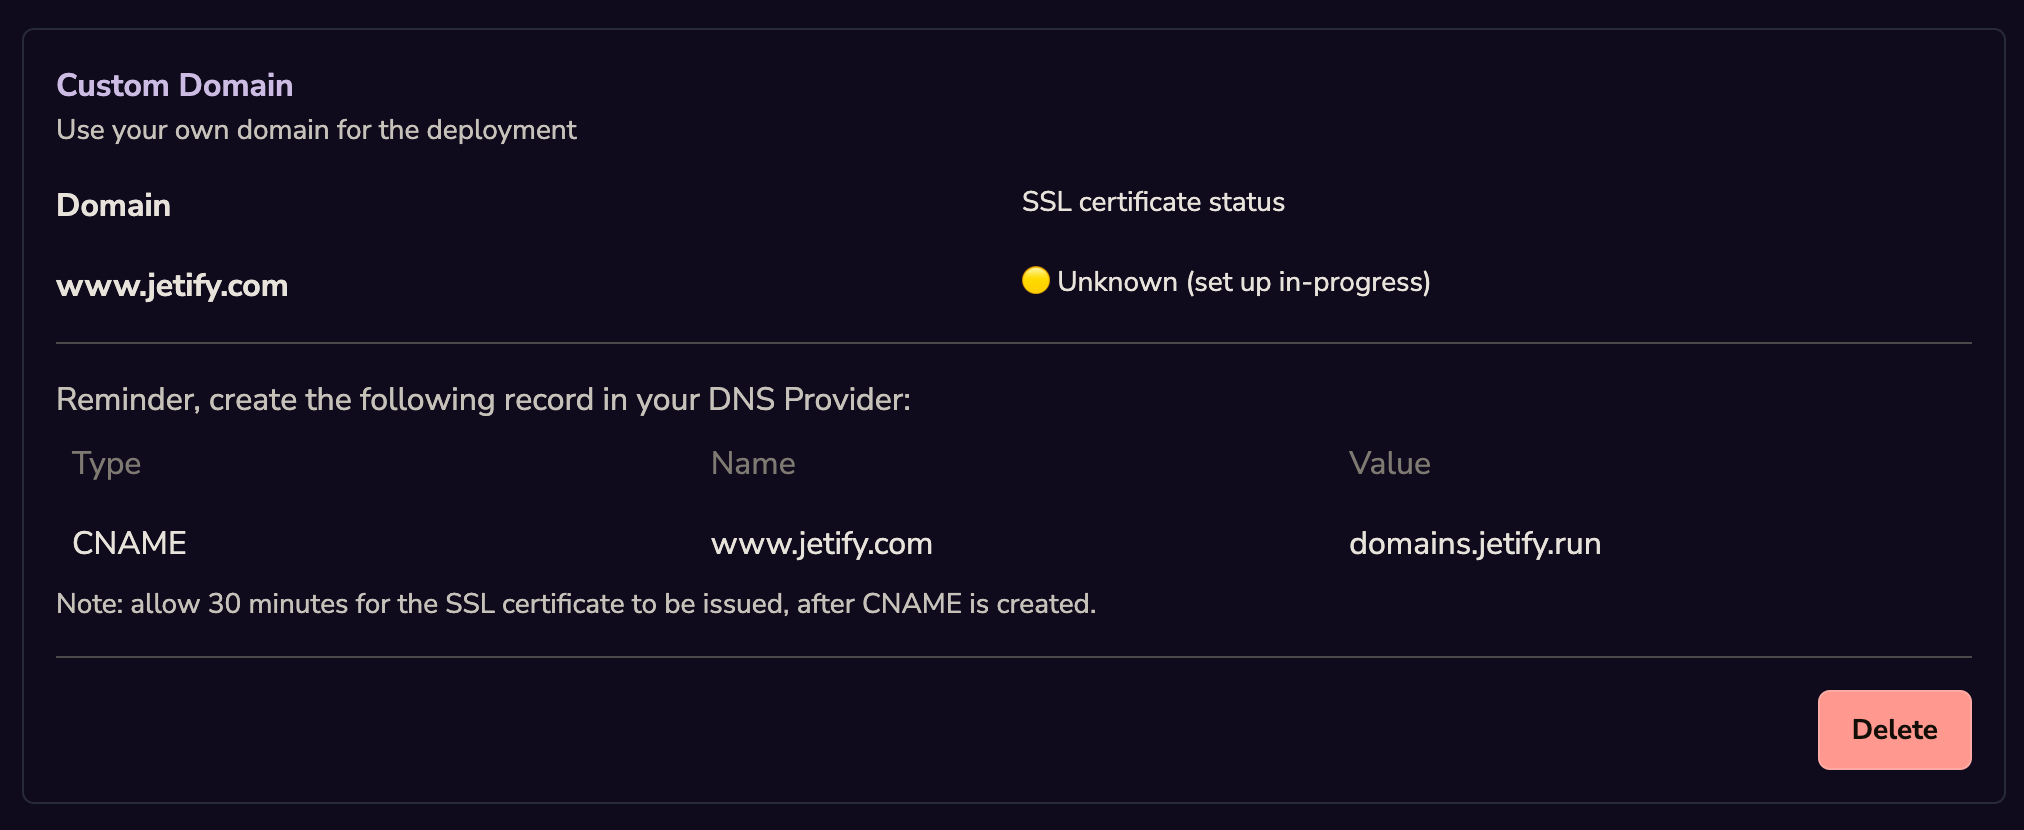
- After you click confirm, your custom domain will be set in a pending state. To validate the
domain, you will need to add a record to your DNS provider:
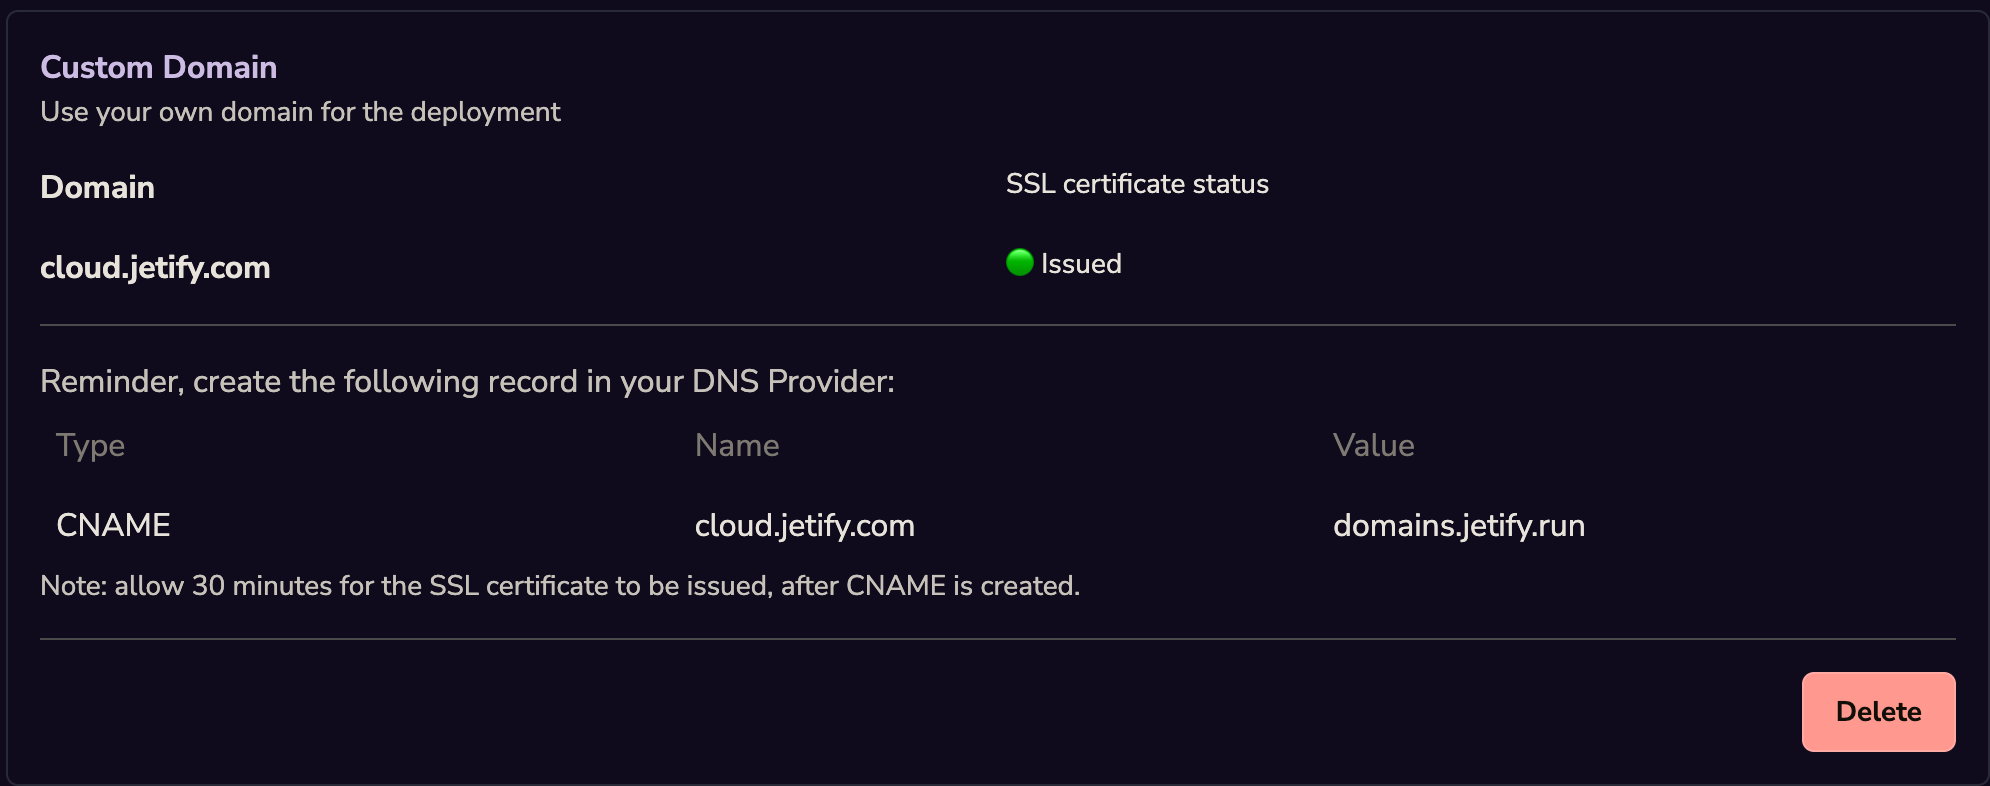
- Once the correct records have been added to your DNS provider, your Custom Domain will display an
Issued status: